6. Configure WDS for Capturing a Reference Image
6-1. The 2 Important .wim files (Images)
Compare the important .wim files:- Boot.wim
- Capture.wim

PS: Must set the Capture image online and the Boot image offline.
When Press "F12" at the reference PC, it will connect to the WDS server and using "Captured.wim" to process.

6-2. Create Capture Image
Right click on the image, select "Create Capture Image..."
Change the file name "setup" to "Capture"

Then clicks "Browse..."

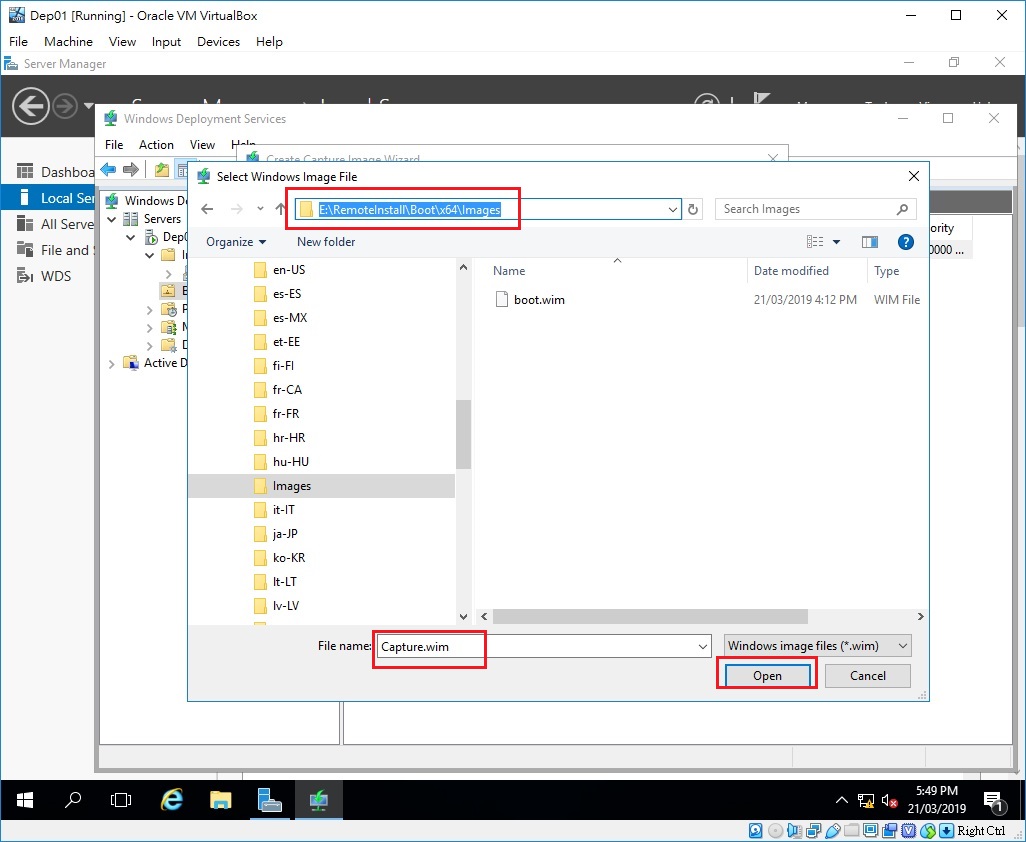
Go to the boot.wim file location "E:\Remoteinstall\boot\x64\images", then
Type "Capture.wim" in the file name then click "Open"
Double check image name and file name are correct, then click "Next"

This step may take 10 minutes

Click "Finish"
PS: Do not select "Add image to the windows deployment server now"

Back to the server manager, click the refresh icon

Back to the WDS management, click the server, click the refresh icon

Now the 2 boot images appear and both statuses are "Online"

6-3. Disable boot image
There is only one boot image can be online at the same time, Boot or Capture. So Boot image has to be disabled in this lab.Right click on the "Microsoft Windows Setup (x64)"
Select "Disable" to take it offline

Now, setup is offline and only Capture is online

6-4. Capture Reference Image
Turn on the "Windows 10 Reference" virtual machinePress "F12"

It shows that it connects to 10.0.0.3 and loading capture.wim. This means we are doing the correct configuration
PS: If it is loading the file "Boot.wim" then must turn off this machine and go back to WDS server offline the boot.wim

It pops up the Capture wizard
Click "Next"

Select D:\
PS: If there is no drive or only c:\ drive, then turn off this machine and redo the sysprep on this reference PC. Because sysprep was failed.
Type "Captured Image" as the image name
Type "Captured Company Image" as the image description
Click "Next"

Click "Browse..."

Select D drive
Type "Capture.wim"
Click "Save"
PS: The setting here is to tell the computer to save the capture.wim in the D:\ of this reference machine, then transfer to the WDS server. The next step is to tell this process where is the WDS server (IP)

Enable "Upload image to a Windows Deployment Services Server"
Type"10.0.0.3" for the server name
Click "Connect"

Type the domain administrator name with the domain name.
PS: Both 2 formats are acceptable
- domain name \ administrator name
- administrator name @ domain name
Type password
Click "OK"

If the connection is successful, then Select "Windows 10 Group"
Click "Next"

This may take 20 - 30 minutes

Click "Finish"

Now we can power off the reference PC

PS: You can keep the reference PC running. This reference machine is possibly failed to install the windows because it is corrupt in the capturing process.
No comments:
Post a Comment