before reading this chapter, you may read the related articles blow
Storage Space
0. Overview
0-1. What is Storage Space
Storage Spaces is a technology in Windows and Windows Server that can help protect your data from drive failures. It is conceptually similar to RAID, implemented in software. You can use Storage Spaces to group three or more drives together into a storage pool and then use capacity from that pool to create Storage Spaces. These typically store extra copies of your data so if one of your drives fails, you still have an intact copy of your data. If you run low on capacity, just add more drives to the storage pool. ( refer to Microsoft Storage Space)
0-2. Lab Environment Preparation
Before doing this lab, the environment must be set up. The lab environment configuration is like below table or refers to the preparation article (
Storage Space, iscsi and FSRM Lab Environment Preparation).
Computer name
|
DC01
|
FS01
|
FS02
|
IP address
|
10.0.0.1
|
10.0.0.3
|
10.0.0.5
|
Role
|
Domain Controller,
iscsi initiator
|
File server,
Storage space server
iscsi target,
FSRM server
|
File server,
iscsi initiator
|
CPU
|
4
|
4
|
4
|
RAM
|
4
|
4
|
4
|
HDD
|
c:50GB
|
c:50GB
VD01:10GB
VD02:10GB
VD03:10GB
VD04:10GB
VD05:30GB
VD06:20GB
|
c:50GB
|
Domain Name: JamesLab.com
Domain Administrator: sysop
1. Implementation
1-1. Create Storage Pool
In server manager, click "File and Storage Services"--> "Storage Pools". The unmounted 6 virtual disks appear at the right button corner.
Right click on the "Primordial" --> click "New Storage Pool"
At the "New Storage Pool Wizard", "Before you begin" page, click "Next"
Type "
StoragePool1" at the Name textbox, then click "Next"
Select the 3 10GB Virtual Disks then click "Next". (you can sort them by clicking on the Field Name)
Check the settings on the Confirmation page then click "Create"
When it completed, click "Close"
1-2 Create Virtual Disk
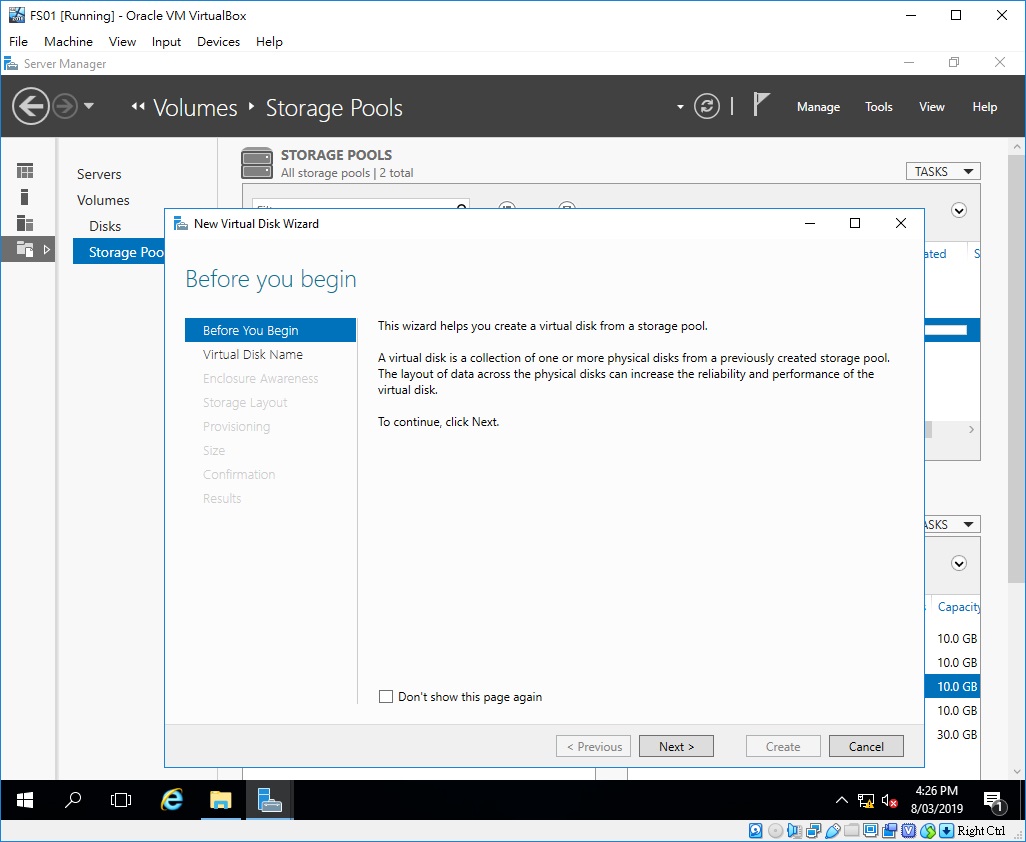
Right click on the "StoragePool1" which just be created, click "New Virtual Disk"
Click "OK"
Click "Next"
Type "
Pool1VD01" in the Name textbox, then click "Next"
Click "Next". Here we don't need to enable enclosure awarness
Select "
Parity" instead of "Mirror", then click"Next"
Select "
Thin" instead of "Fixed", then click "Next". The "Thin" is as "Dynamic" as other storage tools
Type "
20" GB in the Specify size. Click "Next". We will practice add and expand disk later.
Check the information in the confirmation page, then click "Create"
When it completes the creation, click "Close". It will open the Create Volume wizard automatically.
1-3 Create Volume
In the Create Volume wizard, click "Next"
Select "
Pool1VD01" at the lower windows and click "Next"
Set the volume as max size 19.9 GB, then click "Next"
Select drive letter as "P"
Click "Next"
Check information at the confirm selections, then click "Create"
When the Volume creation is completed, click "Close"
2. Review completed tasks
2-1. Review Storage Pool
Click "Storage Pools" at the left panel, "StoragePool1" is created and "
PoolVD01" is created at the bottom "Virtual Disk" window
2-1. Review Virtual Disks
Click "Disks" at the left panel, a volume is created as "P" letter with 19.9 GB
2-3. Review Volumes
Click "Volumes" at the left panel, check the volume is created with 19.9 GB as "Thin" Provisioning
2-4. Verify the disk has been created and ready to use
Open file explorer, click "This PC", a hard drive as letter "P" with 19.8 GB is able to use.