Showing posts with label Storage Spaces Direct S2D. Show all posts

Storage Spaces Direct S2D Chapter 1 - Overview and Preparation

Related chapters


S2D

0. Overview

   0-1. What is Storage Spaces Direct S2D

Storage Spaces Direct uses industry-standard servers with local-attached drives to create highly available, highly scalable software-defined storage at a fraction of the cost of traditional SAN or NAS arrays. Its converged or hyper-converged architecture radically simplifies procurement and deployment, while features such as caching, storage tiers, and erasure coding, together with the latest hardware innovations such as RDMA networking and NVMe drives, deliver unrivalled efficiency and performance. (Refer to Storage Spaces Direct overview)

   0-2. Powershell installation

In this Lab, we will use PowerShell to build up because some features are not supported by using server manager to build up.

1. Lab Preparation

   1-1. Environment Setup

Before doing the lab, we need to set up the lab environment. The lab environment is as the table below:

Domain Name: JamesLab.com
Domain Administrator: sysop


1-2 Computer Setup

Domain Controller

DHCP

DNS

Node01

Node02

1-3. Create Fixed 5GB SSD * 6

Create 3 * 5GB fixed SSD for each Node01 and Node02 from VirtualBox Manager

1-4. Install Failover Clustering Feature

Install Failover Clustering Feature on Node01 and Node02
Refer to the chapter to see how to install Failover Clustering Feature (Failover Cluster Chapter 4 - Cluster Validation). Just need to finish the installation, don't need to do the validation. We will do it by using PowerShell in the next chapter.
When finished, click "Close"

1-5. Open Powershell

Right click on the windows logo, click search, type "Powershell"
Right click on the Powershell, select "Run as administrator"

Click "Yes"

The Powershell is opened.


Storage Spaces Direct S2D Chapter 2 - Install and configure Cluster with Powershell

Related chapters


S2D

2. Install and configure Cluster with PowerShell

   2-1. Test Cluster (Validation)

Type the Powershell command below to test the cluster

Open file explorer, go the path to see the report

Validation Report

   2-2. Install Cluster

Type the Powershell command to create a new cluster

Open file explorer, go the path to see the report

Cluster report

The warning message is about the witness disk. We will create it later.

   2-3. Check Node status

Check the status of the nodes by using the command

Also, check the node status from the failover cluster manager

   2-4. Create Storage Pool

Type the command and press enter, then type "y" press enter to proceed

Check Pool

Create Disk and Volume

Check the disk Created at the manager

Go the Nodes select "disk" tab from each node to see which is holding the disk.
In my case is Node02

Double check the disk owner by using Powershell


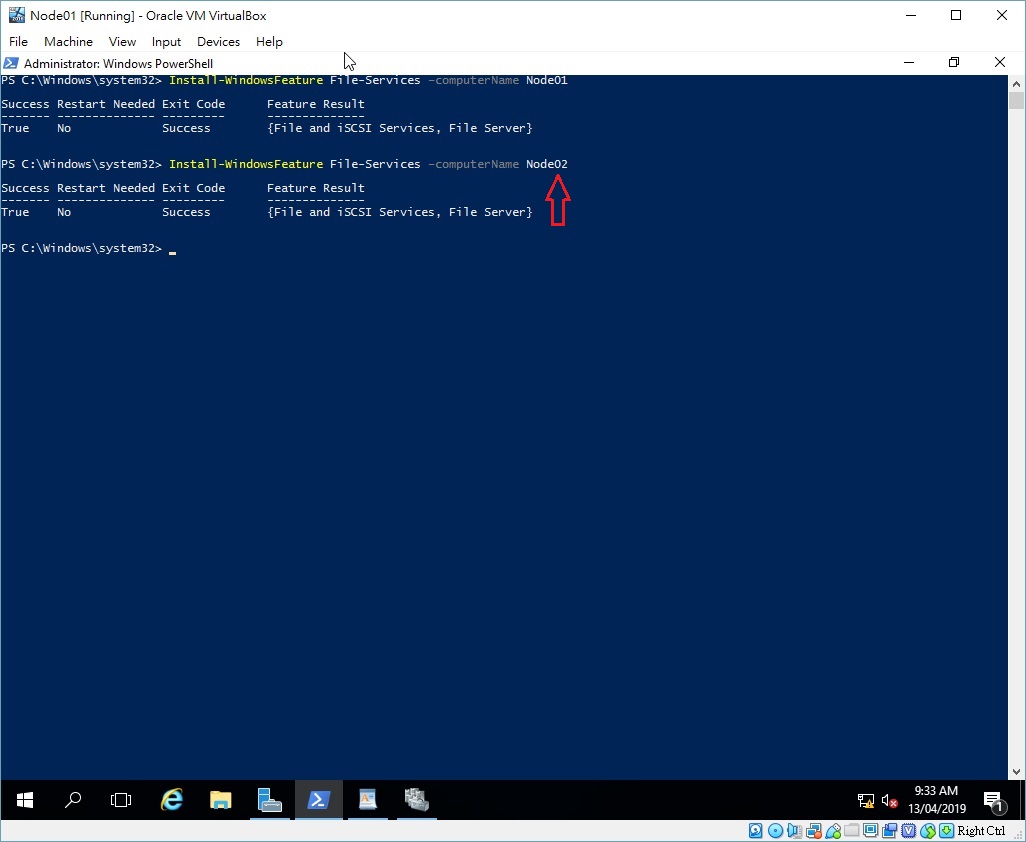
   2-5. Install File Server

Install file server feature on Node01

Install file server feature on Node02

Install file server feature on Cluster1 and install the scale-out file server

Check the file server role

Create File Share

Fire share created


Storage Spaces Direct S2D Chapter 3 - Create Witness share

Related chapters


S2D

3. Create Witness share

3-1. Create a shared folder on DC01

Go to DC01, open file explorer, create a folder on c: drive

Name it "Witness"

   3-2. Assign permission on the computer account "Cluster1"

Right click on the witness folder, select "Property"

Click the "Sharing" tab, click "Advanced Sharing..."

Select "Share the folder", click "Permission", click "Add...", Click "Object Types..."

Select "Computers", click "OK"

Type "Cluster1", click "Check Names", click "OK"

Select the computer, assign "Full control" permission

   3-3. Configure Quorum

Switch to the server Node01
Right-click the server, select "More Actions", Click "Configure Cluster Quorum Settings..."

Click "Next"

Select "Select the Quorum Witness", Click "Next"

Select "Configure a file share witness", click "Next"

Click "Browse..."

Type "dc01", click "Show Shared Folders", it will appear the witness folder automatically.

Click "Next"

Click "Next"

Click "Finish"

   3-4. Check the quorum

The file share witness is created

Double check by using Powershell command.