1. 第三十章 定位和定位方式
a. 定位方式
1. absolute:絕對位置,依照座標定位在頁面的絕對位置,頁面捲動就會移動。
2. fixed:固定位置,頁面捲動還是不會移動,一直在畫面的固定位置。
b. 塊級 (block) 格式化環境
塊級:<p> or <div>,詳見課本P23-2 ~ P23-7
1. Box (<div>)之間的垂直距離是根據2個 Box 的 margin 取最大值而定。
2. Box (<div>)之間的水平距離是根據2個 Box 的 margin 相加而定。
c. 行內級 (in-line) 格式化環境
行內級:<b> or <span>,詳見課本P23-2 ~ P23-7
就是設定每一行內文字的間距、顏色、大小等等
Showing posts with label HTML 5 & CSS 3. Show all posts
Showing posts with label HTML 5 & CSS 3. Show all posts

HTML5 & CSS3 Part 8
1. Text attributes
a. Indentation: text-indent: 3em
b. Alignment: text-align: left
c. Text decoration: text-decoration: underline
d. Letter spacing: letter-spacing: 0.5em
e. Handling blanks and line breaks:
1. There are several blanks in the code, the page shows a few blanks: white-space: pre
2. Combine the general blank, that is, the web page only displays a blank: white-space: normal
3. Same as normal, and can't be split: white-space: nowrap
4. Do not merge general whitespace, only branch when a new line appears in the original file: white-space: pre-wrap
5. Merge general blanks, only branches when new lines appear in the original file: white-space: pre-line
a. Indentation (縮排):text-indent: 3em
b. Alignment (對齊):text-align: left
c. Text decoration (文字裝飾):text-decoration: underline
d. Letter spacing (字母間距):letter-spacing: 0.5em
e. 處理空白和換行:
1. 程式碼中有幾個空白,網頁就顯示幾個空白:white-space: pre
2. 合併一般空白,就是網頁只顯示一個空白:white-space: normal
3. 跟 normal 一樣,且不可分行:white-space: nowrap
4. 不合併一般空白,只有在原始檔中出現新行時才分行:white-space: pre-wrap
5. 合併一般空白,只有在原始檔中出現新行時才分行:white-space: pre-line
2. Transition (轉場效果)
a. Transition:Different pre-words for different browsers
1. Chrome: -webkit-
2. Firefox: -moz-
3.opera: -o-
4. IE:not support
b. Example
1. Need 2 JS, one CSS, and a few pictures.
Code:
<title> Transition Demo</title>
<link rel="stylesheet" href="refineslide.css" />
</head>
<body>
<ul class="rs-slider">
<li><img src="images/01.jpg" /></li>
<li><img src="images/02.jpg" /></li>
<li><img src="images/03.jpg" /></li>
<li><img src="images/04.jpg" /></li>
<li><img src="images/05.jpg" /></li>
<li><img src="images/06.jpg" /></li>
<li><img src="images/07.jpg" /></li>
<li><img src="images/07.jpg" /></li>
</ul>
<script src="jquery.js"></script>
<script src="jquery.refineslide.min.js"></script>
<script>
$(document).ready(function () {
$('.rs-slider').refineSlide();
});
</script>
</body>
</html>
Result:


a. Indentation: text-indent: 3em
b. Alignment: text-align: left
c. Text decoration: text-decoration: underline
d. Letter spacing: letter-spacing: 0.5em
e. Handling blanks and line breaks:
1. There are several blanks in the code, the page shows a few blanks: white-space: pre
2. Combine the general blank, that is, the web page only displays a blank: white-space: normal
3. Same as normal, and can't be split: white-space: nowrap
4. Do not merge general whitespace, only branch when a new line appears in the original file: white-space: pre-wrap
5. Merge general blanks, only branches when new lines appear in the original file: white-space: pre-line
a. Indentation (縮排):text-indent: 3em
b. Alignment (對齊):text-align: left
c. Text decoration (文字裝飾):text-decoration: underline
d. Letter spacing (字母間距):letter-spacing: 0.5em
e. 處理空白和換行:
1. 程式碼中有幾個空白,網頁就顯示幾個空白:white-space: pre
2. 合併一般空白,就是網頁只顯示一個空白:white-space: normal
3. 跟 normal 一樣,且不可分行:white-space: nowrap
4. 不合併一般空白,只有在原始檔中出現新行時才分行:white-space: pre-wrap
5. 合併一般空白,只有在原始檔中出現新行時才分行:white-space: pre-line
2. Transition (轉場效果)
a. Transition:Different pre-words for different browsers
1. Chrome: -webkit-
2. Firefox: -moz-
3.opera: -o-
4. IE:not support
b. Example
1. Need 2 JS, one CSS, and a few pictures.
Code:
<title> Transition Demo</title>
<link rel="stylesheet" href="refineslide.css" />
</head>
<body>
<ul class="rs-slider">
<li><img src="images/01.jpg" /></li>
<li><img src="images/02.jpg" /></li>
<li><img src="images/03.jpg" /></li>
<li><img src="images/04.jpg" /></li>
<li><img src="images/05.jpg" /></li>
<li><img src="images/06.jpg" /></li>
<li><img src="images/07.jpg" /></li>
<li><img src="images/07.jpg" /></li>
</ul>
<script src="jquery.js"></script>
<script src="jquery.refineslide.min.js"></script>
<script>
$(document).ready(function () {
$('.rs-slider').refineSlide();
});
</script>
</body>
</html>
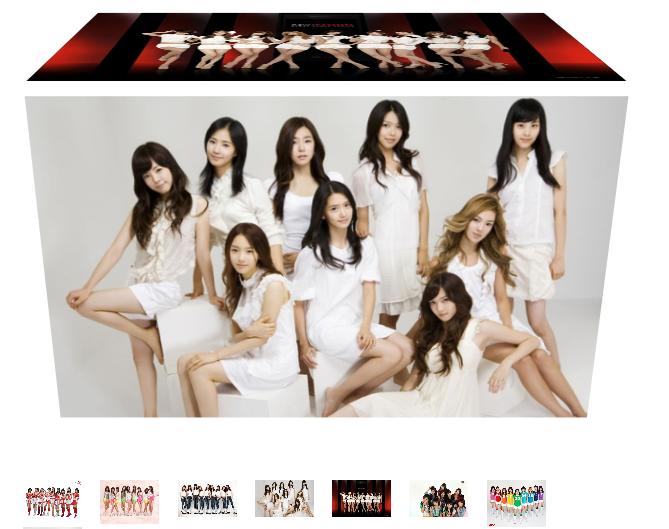
Result:

HTML5 & CSS3 Part 7
1.Canvas
a. Browser support / not support Canvas
1. IE8 not support

2. Chrome support
3. Firefox support
 b. 要通過 JavaScript來繪製,Canvas 本身是沒有繪圖能力的
b. Canvas itself has no drawing ability, need using Javascript to draw it
1.以下程式碼順序不可相反
1. The following code sequences cannot be reversed


c. 滑鼠點色塊,色塊就往右移動
c. Click on the color block and the color block will move to the right.
Code:

PS:Advance reference websites
HighChars :Provide Provide graphics such as drawing reports (提供繪製報表等圖形)
http://www.highcharts.com/
http://www.dotblogs.com.tw/lastsecret/archive/2011/01/30/21137.aspx
2. File structure element (檔案結構元素 )
a. 結構元素
1. <div> 可以分區段,但是沒有語義。
2. 利用 HTML5 新增的檔案結構元素,代替<div>,並可含有語義,使得更加易讀,也可讓搜尋引擎更好的理解頁面的內容和各部分之間的關係。
3. 文章語義:<artical>、<header>、<footer>
4. 內容區塊語義:<section>
5. 側欄和瀏覽:<aside>、<nav>
6. 當一個容器需要被直接定義樣式或通過程式定義行為時,建議使用<div>元素而非<section>。
a. Structure element
1. <div> can be divided into sections, but without semantics.
2. Use HTML5's new file structure elements instead of <div>, and can contain semantics, making it easier to read, and also let the search engine better understand the content of the page and the relationship between the parts.
3. Article semantics: <artical>, <header>, <footer>
4. Content block semantics: <section>
5. Sidebar and browse: <aside>, <nav>
6. When a container needs to be directly defined or defined by a program, it is recommended to use a <div> element instead of a <section>.
3. Offline web app (離線網路應用程式)
a. 離線瀏覽
1. 需使用 manifest 檔來輔助離線瀏覽
2. manifest 紀錄需要 cache 的資源有哪些,也就是需要下載的檔案及圖片包還那些。
3. 連結資料庫所取得的資料無法使用 manifest 來達成離線瀏覽。
a. Offline browsing
1. Use the manifest file to assist offline browsing
2. The manifest records the resources that need to be cached, that is, the files and image packages that need to be downloaded.
3. The data obtained from the linked database cannot be accessed using the manifest.
4. Focus
a. Move focus to an element (將焦點移到某個元素上)
1. 使用tab瀏覽: 按 tab 會跳到 a2
1. Use tab to browse: when press tab to jump to a2
<form id="form1" name="form1" method="post" action="">
<label for="a1">a1:</label>
<input type="text" name="a1" id="a1" />
</form>
<form id="form2" name="form2" method="post" action="">
<label for="a2">a2:</label>
<input type="text" name="a2" id="a2" />
</form>
2.一進頁面,游標就在可輸入文字的地方
2. Once in the page, the cursor is in the place where you can enter text.
<script>
document.getElementById("a1").focus();
</script>
 3. 不論游標在哪裡,一按 Enter 就送出。(002.html 送出到 001.html)
3. Regardless of where the cursor is, press Enter to send it. (002.html sent to 001.html)
因為按鈕的 type 是submit,而且是針對一整個 form1。
Because the type of the button is submit, and it is for an entire form1.


按下 Enter 後轉至001.html
Press Enter and go to 001.html

4. 不論游標在哪裡,按 Enter 都不會送出。只有用滑鼠按 "按鈕" 才會送出。(003.html 送出到 001.html)
4. Regardless of where the cursor is, press Enter and it will not be sent. It will only be sent by pressing the "button" with the mouse. (003.html sent to 001.html)
因為按鈕的 type 僅是 button,而 submit 是寫在 on-click 事件裡面,因此只有當滑鼠按下按鈕時,才會觸發事件"送出",然後將頁面轉至 001.html。
Because the button's type is the only button and submit is written in the on-click event, the event "send" is triggered only when the mouse is pressed, and then the page is moved to 001.html.


b. Drag and Drop
1. Result

2. Create CSS code

3. Create JavaScript & function events

a. Browser support / not support Canvas
1. IE8 not support
2. Chrome support
3. Firefox support

b. Canvas itself has no drawing ability, need using Javascript to draw it
1.以下程式碼順序不可相反
1. The following code sequences cannot be reversed


c. 滑鼠點色塊,色塊就往右移動
c. Click on the color block and the color block will move to the right.
Code:

PS:Advance reference websites
HighChars :Provide Provide graphics such as drawing reports (提供繪製報表等圖形)
http://www.highcharts.com/
http://www.dotblogs.com.tw/lastsecret/archive/2011/01/30/21137.aspx
2. File structure element (檔案結構元素 )
a. 結構元素
1. <div> 可以分區段,但是沒有語義。
2. 利用 HTML5 新增的檔案結構元素,代替<div>,並可含有語義,使得更加易讀,也可讓搜尋引擎更好的理解頁面的內容和各部分之間的關係。
3. 文章語義:<artical>、<header>、<footer>
4. 內容區塊語義:<section>
5. 側欄和瀏覽:<aside>、<nav>
6. 當一個容器需要被直接定義樣式或通過程式定義行為時,建議使用<div>元素而非<section>。
a. Structure element
1. <div> can be divided into sections, but without semantics.
2. Use HTML5's new file structure elements instead of <div>, and can contain semantics, making it easier to read, and also let the search engine better understand the content of the page and the relationship between the parts.
3. Article semantics: <artical>, <header>, <footer>
4. Content block semantics: <section>
5. Sidebar and browse: <aside>, <nav>
6. When a container needs to be directly defined or defined by a program, it is recommended to use a <div> element instead of a <section>.
3. Offline web app (離線網路應用程式)
a. 離線瀏覽
1. 需使用 manifest 檔來輔助離線瀏覽
2. manifest 紀錄需要 cache 的資源有哪些,也就是需要下載的檔案及圖片包還那些。
3. 連結資料庫所取得的資料無法使用 manifest 來達成離線瀏覽。
a. Offline browsing
1. Use the manifest file to assist offline browsing
2. The manifest records the resources that need to be cached, that is, the files and image packages that need to be downloaded.
3. The data obtained from the linked database cannot be accessed using the manifest.
4. Focus
a. Move focus to an element (將焦點移到某個元素上)
1. 使用tab瀏覽: 按 tab 會跳到 a2
1. Use tab to browse: when press tab to jump to a2
<form id="form1" name="form1" method="post" action="">
<label for="a1">a1:</label>
<input type="text" name="a1" id="a1" />
</form>
<form id="form2" name="form2" method="post" action="">
<label for="a2">a2:</label>
<input type="text" name="a2" id="a2" />
</form>
2.一進頁面,游標就在可輸入文字的地方
2. Once in the page, the cursor is in the place where you can enter text.
<script>
document.getElementById("a1").focus();
</script>

3. Regardless of where the cursor is, press Enter to send it. (002.html sent to 001.html)
因為按鈕的 type 是submit,而且是針對一整個 form1。
Because the type of the button is submit, and it is for an entire form1.

按下 Enter 後轉至001.html
Press Enter and go to 001.html

4. 不論游標在哪裡,按 Enter 都不會送出。只有用滑鼠按 "按鈕" 才會送出。(003.html 送出到 001.html)
4. Regardless of where the cursor is, press Enter and it will not be sent. It will only be sent by pressing the "button" with the mouse. (003.html sent to 001.html)
因為按鈕的 type 僅是 button,而 submit 是寫在 on-click 事件裡面,因此只有當滑鼠按下按鈕時,才會觸發事件"送出",然後將頁面轉至 001.html。
Because the button's type is the only button and submit is written in the on-click event, the event "send" is triggered only when the mouse is pressed, and then the page is moved to 001.html.

按下按鈕後轉至001.html
Press the button and go to 001.html
b. Drag and Drop
1. Result

2. Create CSS code

3. Create JavaScript & function events

HTML5 & CSS3 Part 6
1. CSS Selector
a. 選擇符 (Selector,也稱為選擇器) (純理論):分為
1.通用: *.warninr = .warning 或 *#myid = #myid 等
2.類型 (class):可自訂類別,用.來代表class
3.屬性:例如 h1、span
4.ID:用 #來代表ID
5.偽類 (Pseudo-classes):是添加到選擇器的關鍵字,用於指定所選元素的特殊狀態。 例如,當用戶的指針懸停在按鈕上時,懸停可用於更改按鈕的顏色。
a. There are 5 kinds of Selector
1.General: *.warninr = .warning or *#myid = #myid
2.class:use . to represent class
3.attribute:for example: h1、span
4.ID:use # to represent ID
5.Pseudo-classes:is a keyword added to a selector that specifies a special state of the selected element(s). For example, :hover can be used to change a button's color when the user's pointer hovers over it.
2. BOX
a. margin:邊線往外的空白,預設為0,但 body 預設不為零。
b. border:邊線。
c. padding:邊線往內到內容(content)之間的空白。預設為0。
d. content:內容。
e. 建立可延伸的背景圖:切3個div,然後附上背景圖。
1. div_bg_top
2. div_bg_center (重複背景圖)
3. div_br_bottom

3. block-level & inline-level BOX
a. block-level:例如 P 和 div 都是 塊級BOX的元素
b. inline-level:例如 b 和 span 都是 行內級BOX的元素
a. block-level: <P> and <div> are block-level BOX elements
b. inline-level:<b> and <span> are inline-level BOX elements
a. 選擇符 (Selector,也稱為選擇器) (純理論):分為
1.通用: *.warninr = .warning 或 *#myid = #myid 等
2.類型 (class):可自訂類別,用.來代表class
3.屬性:例如 h1、span
4.ID:用 #來代表ID
5.偽類 (Pseudo-classes):是添加到選擇器的關鍵字,用於指定所選元素的特殊狀態。 例如,當用戶的指針懸停在按鈕上時,懸停可用於更改按鈕的顏色。
a. There are 5 kinds of Selector
1.General: *.warninr = .warning or *#myid = #myid
2.class:use . to represent class
3.attribute:for example: h1、span
4.ID:use # to represent ID
5.Pseudo-classes:is a keyword added to a selector that specifies a special state of the selected element(s). For example, :hover can be used to change a button's color when the user's pointer hovers over it.
2. BOX
a. margin:邊線往外的空白,預設為0,但 body 預設不為零。
b. border:邊線。
c. padding:邊線往內到內容(content)之間的空白。預設為0。
d. content:內容。
e. 建立可延伸的背景圖:切3個div,然後附上背景圖。
1. div_bg_top
2. div_bg_center (重複背景圖)
3. div_br_bottom

3. block-level & inline-level BOX
a. block-level:例如 P 和 div 都是 塊級BOX的元素
b. inline-level:例如 b 和 span 都是 行內級BOX的元素
a. block-level: <P> and <div> are block-level BOX elements
b. inline-level:<b> and <span> are inline-level BOX elements
HTML5 & CSS3 Part 5
1. CSS and Pictures
a. 利用小圖 + "repeat" 來建立 body 背景圖
b. 建立 wrapper、header、navigation、footer
a. Use the small image + "repeat" to create the body background image
b. Create wrapper, header, navigation, footer
Dreamweaver會加入許多程式碼:
Dreamweaver will add a lot of code:

滑鼠未放到圖片前的顏色
The colour of "Sky" before mouse hover the picture

滑鼠放到圖片後的顏色
The colour of "Sky" has been changed when mouse hover the picture

PS:
1. 依照課本步驟,做出來的網頁,會在第一次瀏覽時就讀入與該頁面相關的所有圖檔。若圖檔多且大,會比較慢。一但讀完後,之後對於相關圖片的瀏覽動作就很快了。
2.也可以用下面的程式碼,但是這方法會在當下才下載第二張圖。若第二張圖太大,會使得顯示比較慢。
Code:
<p><img src="image/btn1.JPG" name="btn1" width="150" height="50" id="btn1" onmouseover="document.getElementById('btn1').src='image/btn1a.jpg';" onmouseout="document.getElementById('btn1').src='image/btn1.jpg';" /></p>
PS:
1. In accordance with the textbook steps, the resulting web page will read all the images associated with the page the first time it is viewed. If the image file is large and large, it will be slower. Once you have finished reading it, the browsing action for the related pictures will be very fast.
2. You can also use the following code, but this method will download the second picture now. If the second image is too large, it will make the display slower.
Code:
<p><img src="image/btn1.JPG" name="btn1" width="150" height="50" id="btn1" onmouseover="document.getElementById('btn1').src='image/btn1a.jpg';" onmouseout="document.getElementById('btn1').src='image/btn1.jpg';" /></p>
同場加映:
1.LightBox:點了圖之後,頁面會轉暗,然後點選的圖片會跳出來。
2.Spry:Adobe 的一種表格工具,可從XML接收資料後轉成表格;比單純使用 JSP抓資料庫
Extra Points:
1.LightBox: After clicking the picture, the page will turn dark, and then the selected picture will jump out.
2.Spry: A form tool from Adobe that can be converted into a form after receiving data from XML; it is better than using JSP to capture the database.
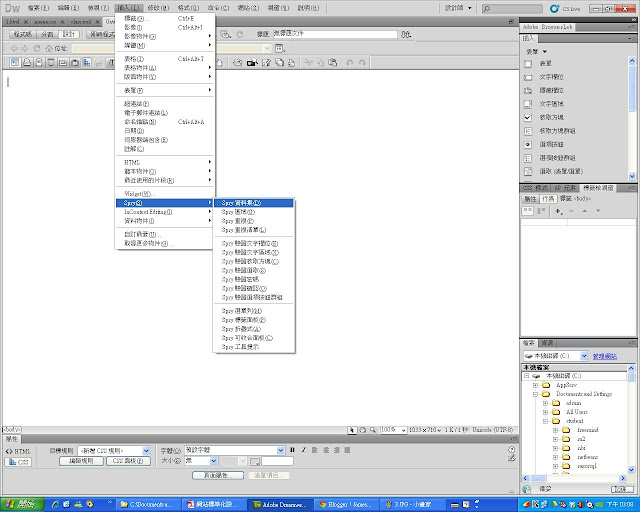
執行結果 1:
Result 1:
 執行結果 2 : 用CSS針對 table、th、td 等標籤畫框框,並增加資料筆數及欄位
Result 2: Use CSS for frame, th, td and other tags to draw frame, and increase the number of data and fields

a. 利用小圖 + "repeat" 來建立 body 背景圖
b. 建立 wrapper、header、navigation、footer
a. Use the small image + "repeat" to create the body background image
b. Create wrapper, header, navigation, footer
Dreamweaver會加入許多程式碼:
Dreamweaver will add a lot of code:

滑鼠未放到圖片前的顏色
The colour of "Sky" before mouse hover the picture

滑鼠放到圖片後的顏色
The colour of "Sky" has been changed when mouse hover the picture

PS:
1. 依照課本步驟,做出來的網頁,會在第一次瀏覽時就讀入與該頁面相關的所有圖檔。若圖檔多且大,會比較慢。一但讀完後,之後對於相關圖片的瀏覽動作就很快了。
2.也可以用下面的程式碼,但是這方法會在當下才下載第二張圖。若第二張圖太大,會使得顯示比較慢。
Code:
<p><img src="image/btn1.JPG" name="btn1" width="150" height="50" id="btn1" onmouseover="document.getElementById('btn1').src='image/btn1a.jpg';" onmouseout="document.getElementById('btn1').src='image/btn1.jpg';" /></p>
PS:
1. In accordance with the textbook steps, the resulting web page will read all the images associated with the page the first time it is viewed. If the image file is large and large, it will be slower. Once you have finished reading it, the browsing action for the related pictures will be very fast.
2. You can also use the following code, but this method will download the second picture now. If the second image is too large, it will make the display slower.
Code:
<p><img src="image/btn1.JPG" name="btn1" width="150" height="50" id="btn1" onmouseover="document.getElementById('btn1').src='image/btn1a.jpg';" onmouseout="document.getElementById('btn1').src='image/btn1.jpg';" /></p>
同場加映:
1.LightBox:點了圖之後,頁面會轉暗,然後點選的圖片會跳出來。
2.Spry:Adobe 的一種表格工具,可從XML接收資料後轉成表格;比單純使用 JSP抓資料庫
Extra Points:
1.LightBox: After clicking the picture, the page will turn dark, and then the selected picture will jump out.
2.Spry: A form tool from Adobe that can be converted into a form after receiving data from XML; it is better than using JSP to capture the database.
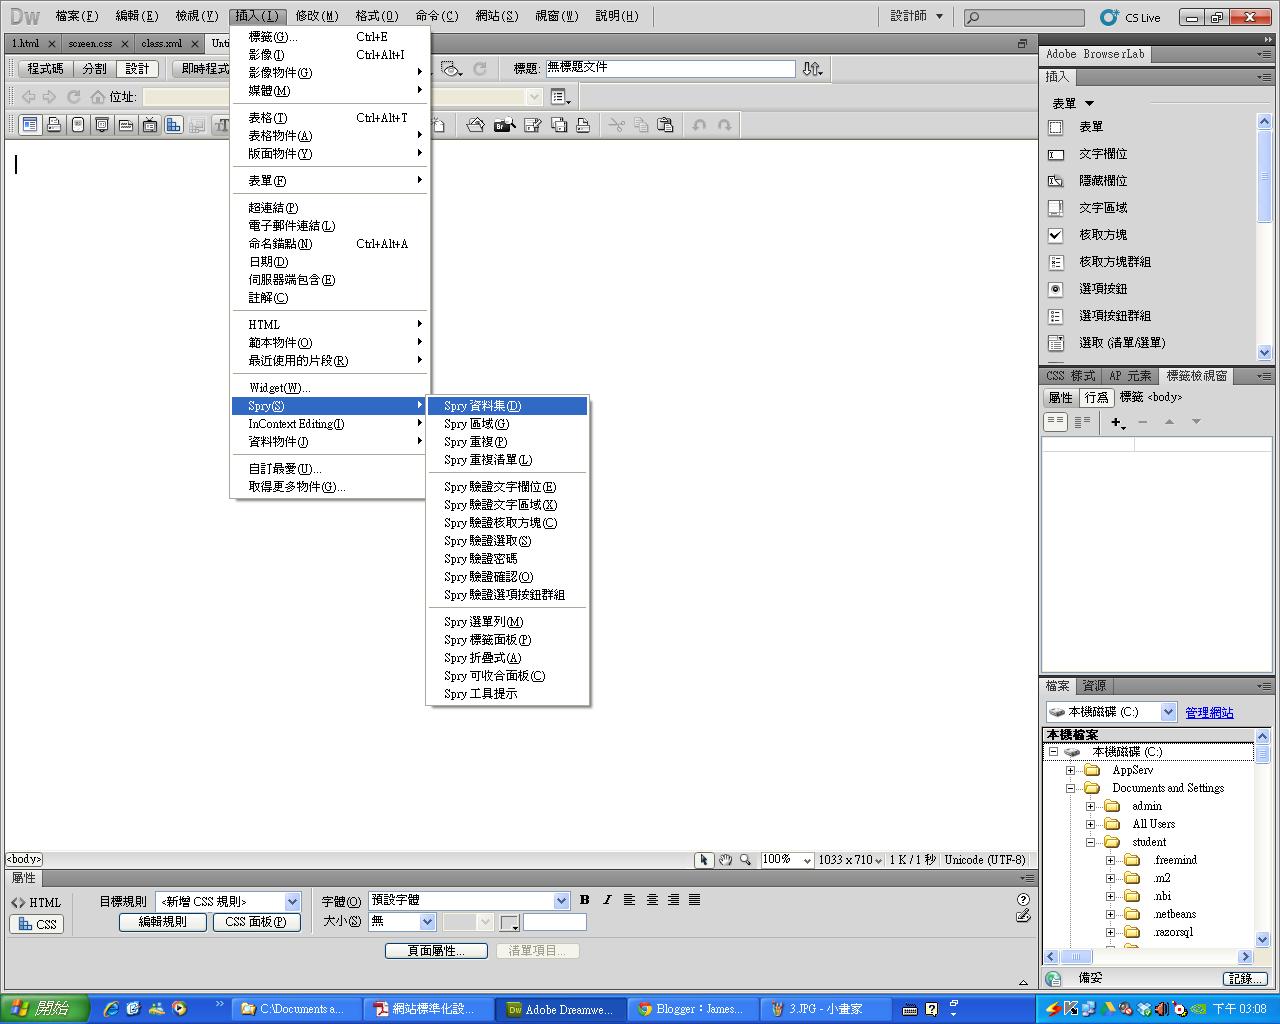
執行結果 1:
Result 1:
Result 2: Use CSS for frame, th, td and other tags to draw frame, and increase the number of data and fields

HTML5 & CSS3 Part 4
1. CSS Basic
a. CSS style 的優先順序:標籤 > ID > 類別
b. <h1> 可以讓搜尋引擎找到,提高網站的曝光率。
進階使用方法:
1. 利用 CSS 來定義 "<h1>標籤",使得 <h1> 不再那麼呆版,如此既可美化,又可被搜尋到。
2. 在 <h1>中夾圖片,然後在 < img > 中放 alt 以及 title,讓搜尋引擎找到,因為圖片中的訊息 alt 以及 title 都包含在 <h1>中。
例如:<h1><img src="123.jpg" title="123" alt="123"></h1>
a. CSS style priority: Tags > ID > Category
b. <h1> can be found by search engines to increase the exposure of the site.
Advanced use:
1. Use CSS to define "<h1> tags" so that <h1> is no longer so slick, so it can be both beautified and searched.
2. Clip the image in <h1>, then put alt and title in < img > for the search engine to find, because the messages alt and title in the image are included in <h1>.
For example: <h1><img src="123.jpg" title="123" alt="123"></h1>
測試CSS style 的優先順序
Test the priority of CSS style
1.建立三個一樣的 table
2. 建立三個 CSS 樣式
1. Create three identical tables
2. Create three CSS styles
( table color: #F00 (紅色)、.ABC color: #FF0 (黃色)、#A color: #00F (藍色))
<style type="text/css">
table {
color: #F00;
}
.ABC {
color: #FF0;
}
#A {
color: #00F;
}
</style>
3. 表格程式碼
說明:
1.所有 table 都會套用 table 標籤CSS 樣式 (紅色)
2.table 2 加上 class="ABC" (黃色),結果 table 2 是呈現黃色
3.table 3 除了 class="ABC" (黃色),再加上 ID="A"(藍色),結果 table 3 是呈現藍色
結論:複合 > ID > 類別 > 標籤
3. Table code
Description:
1. All tables will apply table tag CSS style (red)
2.table 2 plus class="ABC" (yellow), the result table 2 is rendered yellow
3.table 3 except class="ABC" (yellow), plus ID="A" (blue), the result table 3 is blue
Conclusion: Composite > ID > Category > Tags
<body>
<table border="1" >
<caption>table 1</caption>
<tr>
<th width="50" scope="col"><p>12</p></th>
<th width="50" scope="col"> </th>
</tr>
<tr>
<th scope="row"> </th>
<td> </td>
</tr>
</table> <br/>
<table border="1" class="ABC">
<caption>table 2</caption>
<tr>
<th width="50" scope="col">123</th>
<th width="50" scope="col"> </th>
</tr>
<tr>
<th scope="row"> </th>
<td> </td>
</tr>
</table> <br/>
<table border="1" class="ABC" id="A">
<caption>table 3</caption>
<tr>
<th width="50" scope="col"><p>12</p></th>
<th width="50" scope="col"> </th>
</tr>
<tr>
<th scope="row"> </th>
<td> </td>
</tr>
</table> <br/>
</body>

2. div
a. 先設一個版面 "wrapper"
b. 再設定 header 在 wrapper 裡面
c. 接著都是在上一個之後,
header --> content--> sidebar --> footer
a. First set a layout "wrapper"
b. Reset the header in the wrapper
c. Then after the last one,
Header --> content--> sidebar --> footer
Code:
<body>
<div id="wrapper">
<div id="header"> id "header" 的內容放在這裡</div>
<div id="navigation"> id "navigation" 的內容放在這裡</div>
<div id="content"> id "content" 的內容放在這裡</div>
<div id="sidebar"> id "sidebar" 的內容放在這裡</div>
<div id="footer"> id "footer" 的內容放在這裡</div>
</div>
</body>

a. CSS style 的優先順序:標籤 > ID > 類別
b. <h1> 可以讓搜尋引擎找到,提高網站的曝光率。
進階使用方法:
1. 利用 CSS 來定義 "<h1>標籤",使得 <h1> 不再那麼呆版,如此既可美化,又可被搜尋到。
2. 在 <h1>中夾圖片,然後在 < img > 中放 alt 以及 title,讓搜尋引擎找到,因為圖片中的訊息 alt 以及 title 都包含在 <h1>中。
例如:<h1><img src="123.jpg" title="123" alt="123"></h1>
a. CSS style priority: Tags > ID > Category
b. <h1> can be found by search engines to increase the exposure of the site.
Advanced use:
1. Use CSS to define "<h1> tags" so that <h1> is no longer so slick, so it can be both beautified and searched.
2. Clip the image in <h1>, then put alt and title in < img > for the search engine to find, because the messages alt and title in the image are included in <h1>.
For example: <h1><img src="123.jpg" title="123" alt="123"></h1>
測試CSS style 的優先順序
Test the priority of CSS style
1.建立三個一樣的 table
2. 建立三個 CSS 樣式
1. Create three identical tables
2. Create three CSS styles
( table color: #F00 (紅色)、.ABC color: #FF0 (黃色)、#A color: #00F (藍色))
<style type="text/css">
table {
color: #F00;
}
.ABC {
color: #FF0;
}
#A {
color: #00F;
}
</style>
3. 表格程式碼
說明:
1.所有 table 都會套用 table 標籤CSS 樣式 (紅色)
2.table 2 加上 class="ABC" (黃色),結果 table 2 是呈現黃色
3.table 3 除了 class="ABC" (黃色),再加上 ID="A"(藍色),結果 table 3 是呈現藍色
結論:複合 > ID > 類別 > 標籤
3. Table code
Description:
1. All tables will apply table tag CSS style (red)
2.table 2 plus class="ABC" (yellow), the result table 2 is rendered yellow
3.table 3 except class="ABC" (yellow), plus ID="A" (blue), the result table 3 is blue
Conclusion: Composite > ID > Category > Tags
<body>
<table border="1" >
<caption>table 1</caption>
<tr>
<th width="50" scope="col"><p>12</p></th>
<th width="50" scope="col"> </th>
</tr>
<tr>
<th scope="row"> </th>
<td> </td>
</tr>
</table> <br/>
<table border="1" class="ABC">
<caption>table 2</caption>
<tr>
<th width="50" scope="col">123</th>
<th width="50" scope="col"> </th>
</tr>
<tr>
<th scope="row"> </th>
<td> </td>
</tr>
</table> <br/>
<table border="1" class="ABC" id="A">
<caption>table 3</caption>
<tr>
<th width="50" scope="col"><p>12</p></th>
<th width="50" scope="col"> </th>
</tr>
<tr>
<th scope="row"> </th>
<td> </td>
</tr>
</table> <br/>
</body>

2. div
a. 先設一個版面 "wrapper"
b. 再設定 header 在 wrapper 裡面
c. 接著都是在上一個之後,
header --> content--> sidebar --> footer
a. First set a layout "wrapper"
b. Reset the header in the wrapper
c. Then after the last one,
Header --> content--> sidebar --> footer
Code:
<body>
<div id="wrapper">
<div id="header"> id "header" 的內容放在這裡</div>
<div id="navigation"> id "navigation" 的內容放在這裡</div>
<div id="content"> id "content" 的內容放在這裡</div>
<div id="sidebar"> id "sidebar" 的內容放在這裡</div>
<div id="footer"> id "footer" 的內容放在這裡</div>
</div>
</body>

HTML5 & CSS3 Part 3
1. Figure & Figcaption
a.figure & img
1. 過去的寫法
1. Past style of code
<body>
<img src="../../../../../All Users/Documents/My Pictures/Blue hills.jpg" width="800" height="600" />
<p> This is the sample picture </p>
</body>
2. 現在的寫法:利用 figure + figcaption + CSS設定型態
2. New style of code:use figure + figcaption + CSS to set the pattern
<title>No title document</title>
<style type="text/css">
figcaption {
font-style: italic;
font-weight: bold;
color: #F00;
}
</style>
</head>
<body>
<figure>
<img src="../../../../../All Users/Documents/My Pictures/Blue hills.jpg" width="800" height="600" />
<figcaption>This is the sampe picture </figcaption>
</figure>
</body>

3.讓圖片及文字整合成一個超連結:包在 <a href="..."> </a> 之間的圖與文字算是一體
3. Integrate images and text into a hyperlink: the image and text between <a href="..."> </a> are one
Code:
<body>
<figure>
<a href="http://tw.yahoo.com">
<img src="../../../../../All Users/Documents/My Pictures/Blue hills.jpg" width="800" height="600" />
<figcaption>This is the sample picture </figcaption>
</a>
</figure>
</body>

PS:但是圖片會出現 藍色框框
PS:But there is a Blue frame around the picture
4. 將圖片的藍色框框去除:設定 img 的 border ="0"
4. Remove the blue frame of the image: set img's border = "0"
b. img - map
先在一張圖片中加上 map 讓圖中的某些區塊分別有各自的超連結:
1.點選圖片
2.點選下方地圖 map 的 area 屬性 -- retect (矩形)
3. 在沿著google 圖形區域,框出一個大小一樣的矩形
4.在連結的地方輸入google 的超連結;重複上面步驟做出 yahoo的部分
First, add a map to an image so that some of the blocks in the image have their own hyperlinks:
1. Click on the picture
2. Click on the area property of the map below -- retect (rectangular)
3. In the google graphics area, frame a rectangle of the same size
4. Enter the google hyperlink in the link; repeat the above steps to make the yahoo part

5. 加入替代文字:可讓閱讀器讀到,幫助視障者
5. Add a replacement text: let the reader read it and help the visually impaired

6. 加入 title (必須輸入程式碼):讓游標移動至圖片區塊石,出現文字標記
6. Join title (must enter the code): move the cursor to the image block stone and display the text mark

PS1: Other attributes of "img - map" ("img - map" 的其他屬性)
circle:圓形
poly:任意形狀,可根據公司的 logo 而描邊

PS2:以上做法,會在 img 標籤內加入一個 usemap 屬性,名為 "map" (可以自訂名稱)。然後圖片中的每個區塊稱為 area,再加入座標。
PS2: In the above, a usemap attribute will be added to the img tag, named "map" (you can customize the name). Then each block in the picture is called area, and then the coordinates are added.

2. Video and music in HTML5
重點:
1. <source> 不可單獨存在,必須包在 <video> 或 <audio> 裡面。
2. 在 <video> 或 <audio> 之中的多個 <source> 是代表依順序測試能不能撥放。
3. 很多視訊格式 IE8 不支援,可用 flash (副檔名為 flv)檔案,讓 IE8 可以撥放
Important:
1. <source> cannot exist alone and must be wrapped in <video> or <audio>.
2. Multiple <source> in <video> or <audio> means that the test can be played in order.
3. Many video formats are not supported by IE8. The flash (deputy name is flv) file can be used to make IE8 playable.


4. 完成後,會自動在 Deramweaver 中加入許多程式碼,這樣 IE8 就可以播放了
4. When you're done, you'll automatically add a lot of code to Deramweaver so that IE8 can play.
3. iframe
a. Example:
<iframe src="mytest.html" width="600" height="80">
</iframe>
b. Pay attention to the security issue
1. 若將 01 + 04 則會出現在 iframe 中使用 javascript 來控制父頁面的DOM的安全隱憂
1. If 01 + 04 will appear in the iframe, use javascript to control the security of the parent page's DOM.
4. Create Table (建立表格)
a. <table><tr><td></td></tr></table>
1. 內距:內文到邊框的距離
2. 間距:每個 <td> 間的距離
1. Inside distance: the distance from the text to the border
2. Spacing: the distance between each <td>
b. Caption:在表格上方加上標題
在 <table> 後面加上 <caption>
Example:
<table width="300" border="1">
<caption>test table</caption>

c. th + scope attribute
1. 對搜尋引擎來說:會搜尋到同一 scope 的內容
2. 對使用者來說:文字會自動變粗體、置中對齊
3. th 可以行 + 列
1. For search engines: will search for content in the same scope
2. For the user: the text will automatically be bolded, centered and aligned
3. th can be row + column


4. 可再加上 CSS 樣式,會在 th 內自訂 calss 屬性
4-1 做完 CSS 樣式後,選取要套用的物件
4. Can be added with CSS style, custom calss attribute in th
4-1 After completing the CSS style, select the object to be applied.

4-2 在選取下方工具列的 CSS --> 目標規則 --> CSS樣式的類別名稱 (這裡是 h_w)
4-2 Select CSS --> Target Rules --> CSS Style Category Name (here h_w) in the toolbar below

d. thead (table head / 表頭)、tfoot (table foot /表尾)、tbody
1. 在程式碼中,需依照順序 thead --> tfoot --> tbody 來編寫。
2. 若資料筆數非常多,當預覽列印時超過2頁以上,thead 跟 tfoot 都會在每一頁加上
1. In the code, you need to write in the order of thead --> tfoot --> tbody.
2. If there are a lot of data, when the preview prints more than 2 pages, both the head and the tfoot will be added to each page.
5. Create HTML5 new form
a. form
b. input
c. HTML5 new control (新的控制項)
Example:
<form>
<input type="date" />
date<br/>
<input type="datetime" />
datetime<br/>
<input type="time" />
time<br/>
<input type="month" />
month<br/>
<input type="week" />
week<br/>
</form>


a.figure & img
1. 過去的寫法
1. Past style of code
<body>
<img src="../../../../../All Users/Documents/My Pictures/Blue hills.jpg" width="800" height="600" />
<p> This is the sample picture </p>
</body>
2. 現在的寫法:利用 figure + figcaption + CSS設定型態
2. New style of code:use figure + figcaption + CSS to set the pattern
<title>No title document</title>
<style type="text/css">
figcaption {
font-style: italic;
font-weight: bold;
color: #F00;
}
</style>
</head>
<body>
<figure>
<img src="../../../../../All Users/Documents/My Pictures/Blue hills.jpg" width="800" height="600" />
<figcaption>This is the sampe picture </figcaption>
</figure>
</body>

3.讓圖片及文字整合成一個超連結:包在 <a href="..."> </a> 之間的圖與文字算是一體
3. Integrate images and text into a hyperlink: the image and text between <a href="..."> </a> are one
Code:
<body>
<figure>
<a href="http://tw.yahoo.com">
<img src="../../../../../All Users/Documents/My Pictures/Blue hills.jpg" width="800" height="600" />
<figcaption>This is the sample picture </figcaption>
</a>
</figure>
</body>

PS:但是圖片會出現 藍色框框
PS:But there is a Blue frame around the picture
4. 將圖片的藍色框框去除:設定 img 的 border ="0"
4. Remove the blue frame of the image: set img's border = "0"
b. img - map
先在一張圖片中加上 map 讓圖中的某些區塊分別有各自的超連結:
1.點選圖片
2.點選下方地圖 map 的 area 屬性 -- retect (矩形)
3. 在沿著google 圖形區域,框出一個大小一樣的矩形
4.在連結的地方輸入google 的超連結;重複上面步驟做出 yahoo的部分
First, add a map to an image so that some of the blocks in the image have their own hyperlinks:
1. Click on the picture
2. Click on the area property of the map below -- retect (rectangular)
3. In the google graphics area, frame a rectangle of the same size
4. Enter the google hyperlink in the link; repeat the above steps to make the yahoo part

5. 加入替代文字:可讓閱讀器讀到,幫助視障者
5. Add a replacement text: let the reader read it and help the visually impaired

6. 加入 title (必須輸入程式碼):讓游標移動至圖片區塊石,出現文字標記
6. Join title (must enter the code): move the cursor to the image block stone and display the text mark

PS1: Other attributes of "img - map" ("img - map" 的其他屬性)
circle:圓形
poly:任意形狀,可根據公司的 logo 而描邊

PS2:以上做法,會在 img 標籤內加入一個 usemap 屬性,名為 "map" (可以自訂名稱)。然後圖片中的每個區塊稱為 area,再加入座標。
PS2: In the above, a usemap attribute will be added to the img tag, named "map" (you can customize the name). Then each block in the picture is called area, and then the coordinates are added.

2. Video and music in HTML5
重點:
1. <source> 不可單獨存在,必須包在 <video> 或 <audio> 裡面。
2. 在 <video> 或 <audio> 之中的多個 <source> 是代表依順序測試能不能撥放。
3. 很多視訊格式 IE8 不支援,可用 flash (副檔名為 flv)檔案,讓 IE8 可以撥放
Important:
1. <source> cannot exist alone and must be wrapped in <video> or <audio>.
2. Multiple <source> in <video> or <audio> means that the test can be played in order.
3. Many video formats are not supported by IE8. The flash (deputy name is flv) file can be used to make IE8 playable.


4. 完成後,會自動在 Deramweaver 中加入許多程式碼,這樣 IE8 就可以播放了
4. When you're done, you'll automatically add a lot of code to Deramweaver so that IE8 can play.
3. iframe
a. Example:
<iframe src="mytest.html" width="600" height="80">
</iframe>
b. Pay attention to the security issue
1. 若將 01 + 04 則會出現在 iframe 中使用 javascript 來控制父頁面的DOM的安全隱憂
1. If 01 + 04 will appear in the iframe, use javascript to control the security of the parent page's DOM.
4. Create Table (建立表格)
a. <table><tr><td></td></tr></table>
1. 內距:內文到邊框的距離
2. 間距:每個 <td> 間的距離
1. Inside distance: the distance from the text to the border
2. Spacing: the distance between each <td>
b. Caption:在表格上方加上標題
在 <table> 後面加上 <caption>
Example:
<table width="300" border="1">
<caption>test table</caption>

c. th + scope attribute
1. 對搜尋引擎來說:會搜尋到同一 scope 的內容
2. 對使用者來說:文字會自動變粗體、置中對齊
3. th 可以行 + 列
1. For search engines: will search for content in the same scope
2. For the user: the text will automatically be bolded, centered and aligned
3. th can be row + column


4. 可再加上 CSS 樣式,會在 th 內自訂 calss 屬性
4-1 做完 CSS 樣式後,選取要套用的物件
4. Can be added with CSS style, custom calss attribute in th
4-1 After completing the CSS style, select the object to be applied.

4-2 在選取下方工具列的 CSS --> 目標規則 --> CSS樣式的類別名稱 (這裡是 h_w)
4-2 Select CSS --> Target Rules --> CSS Style Category Name (here h_w) in the toolbar below

d. thead (table head / 表頭)、tfoot (table foot /表尾)、tbody
1. 在程式碼中,需依照順序 thead --> tfoot --> tbody 來編寫。
2. 若資料筆數非常多,當預覽列印時超過2頁以上,thead 跟 tfoot 都會在每一頁加上
1. In the code, you need to write in the order of thead --> tfoot --> tbody.
2. If there are a lot of data, when the preview prints more than 2 pages, both the head and the tfoot will be added to each page.
5. Create HTML5 new form
a. form
b. input
c. HTML5 new control (新的控制項)
Example:
<form>
<input type="date" />
date<br/>
<input type="datetime" />
datetime<br/>
<input type="time" />
time<br/>
<input type="month" />
month<br/>
<input type="week" />
week<br/>
</form>


Subscribe to:
Posts (Atom)