FSRM Chapter 1 - Overview FSRM, Install and Configure SMTP
FSRM Chapter 2 - Install and Configure FSRM
FSRM Chapter 3 - Quota
FSRM Chapter 4 - File Screening
FSRM Chapter 5 - Classification
FSRM Chapter 6 - Report
FSRM
2. FSRM Installation and Configuration
2-1. Add FSRM role
Click "Manage", Select "Add Roles and Features"

Click "Next"

Click "Next"

Click "Next"

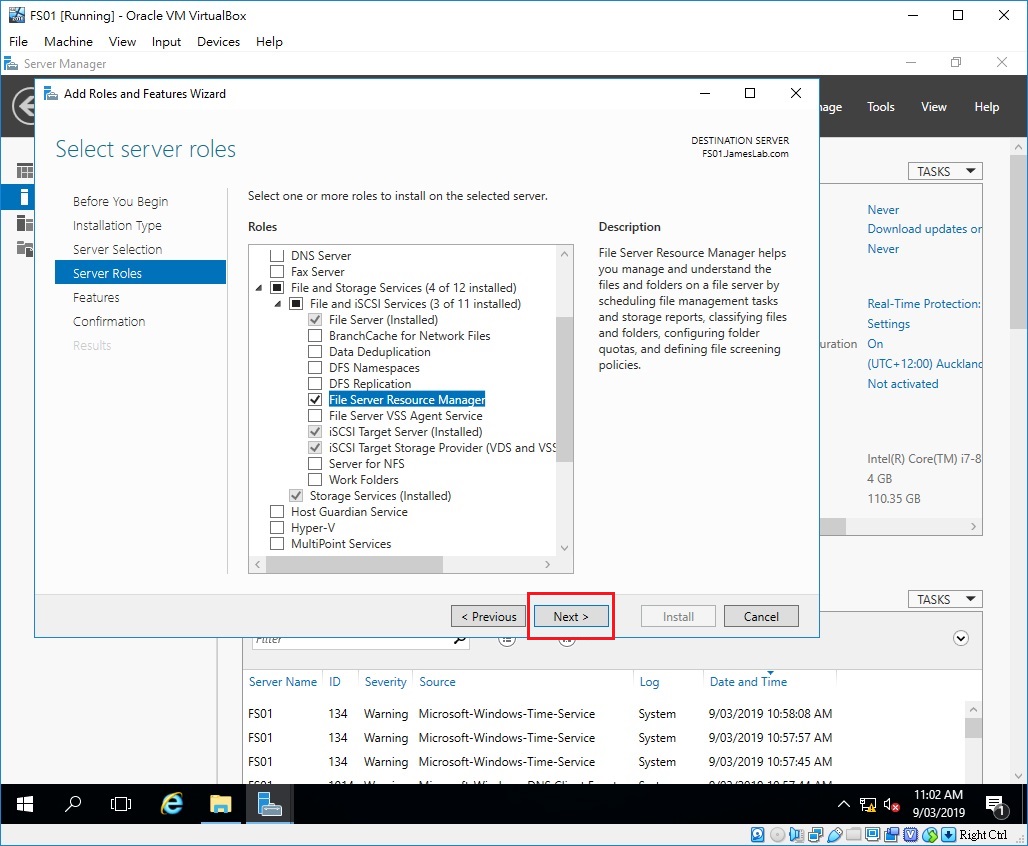
Select "File Server Resource Manager"

Click "Add Features"

Click "Next"
Click "Next"

Click "Install"

Click "Close"

2-2. Configure FSRM
Click "Tools", select "File Server Resource Manager"
There are 5 features listed at the left panel. Before using those features we need to configure it

Right click on the "File Server Resource Manager (Local)", Select "Configure Options..."

Type "10.0.0.3" for the SMTP server
Type "admin@JamesLab.com" for the Default administrator recipients
Click "Send Test Email"

Email Send successfully, click "OK"

2-3. Check the email
Open file explorer, go to the folder P:\Mail\Drop. There is a file just created by the system. It is the EmailDouble click it or open it with notepad.
It tells the email address has been configured as a default

Articles about FSRM
FSRM Chapter 1 - Overview FSRM, Install and Configure SMTP
FSRM Chapter 2 - Install and Configure FSRM
FSRM Chapter 3 - Quota
FSRM Chapter 4 - File Screening
FSRM Chapter 5 - Classification
FSRM Chapter 6 - Report
No comments:
Post a Comment